Publishing and Scheduling a Product
Which status to use at each stage, how to schedule a launch date, and how to discontinue a product.
The four states, and when to use each
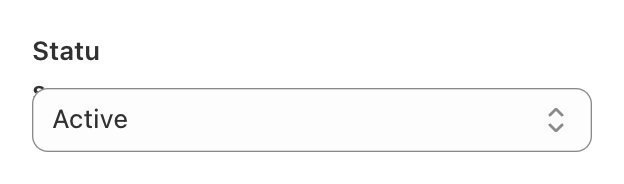
Shopify has two separate things that control whether a product is visible: the status (Draft or Active) and whether it is published to the Online Store sales channel. A product needs both to be visible.
| Stage the product is at | Status | Online Store | Result |
|---|---|---|---|
| Just created, data being entered | Draft | — | Invisible. Safe to work on. |
| Complete but waiting on photography or approval | Draft | — | Invisible. Still safe. |
| Ready, launching now | Active | Published | Live on the website. |
| Ready, launching on a set date | Active | Published, with a date set | Appears automatically on that date. |
| Discontinued, no longer sold | Archived | — | Removed from the website, record kept. |
Step by step
Complete in order. Do not proceed past a checkpoint until its condition is met.
- Create the product as a DraftProducts → Add product
Enter the title and whatever information is available. Set Status to Draft using the dropdown at the top right before saving. A Draft is invisible to customers, so it is safe to leave a product in this state for as long as needed.
Status shows Draft
- Enter the product informationProduct page
Fill in the title, description, media, pricing fields and the Jessar specification fields. Which fields are required for which kind of product, and what each one does to the page, is covered in JES-PRD-02 and the new product checklist.
Checklist complete for this category
- Assign the product to its collectionsProduct page → Product type and Tags
Collection membership on this site is automatic — products are placed by their product type and their shelf tags, not by adding them to collections by hand. Set these correctly and the product appears in the right places on its own. See JES-COL-01 and the shelf tag reference.
Correct product type and shelf tag applied
- Check the page before going liveProduct page → Preview
Use the preview to view the page as a customer would. Sections of the page appear only when their information is present, so a missing field shows up as a missing section rather than as an error.
No empty or broken-looking sections
- Set the product to ActiveProduct page → Status
Change Status from Draft to Active. On its own this does not publish the product — the next step does.
Status shows Active
- Publish to the Online StoreProduct page → Publishing
In the Publishing panel, confirm Online Store is ticked. If it is not, the product will not appear on the website regardless of its status. This is the step most often missed.
Online Store listed and ticked
- Confirm it is livejessar.ca
Open the product page on the website and confirm it loads, then check that it appears in its collection.
Page loads and product appears in its collection
Setting a launch date in advance
When a product is finished but should not appear until a particular day, set a publish date rather than trying to remember to publish it manually on the morning.
- Finish the product and set it to ActiveProduct page → Status
Complete the product exactly as in the previous section, including setting the status to Active. Scheduling does not work on a Draft.
Status is Active and all information complete
- Set the date on the Online Store channelProduct page → Publishing
In the Publishing panel, open the Online Store options and choose to schedule availability. Set the date and time the product should appear. Shopify uses the store's timezone, not yours if you are elsewhere.
Publishing panel shows the product as scheduled, with the date
- Note it for the launch dayOutside Shopify
Keep a note of scheduled products so that someone confirms on the day that they appeared as expected.
The date is recorded somewhere the team will see it
If a product is not showing on the website
Work through these four in order. In practice it is almost always the second one.
| # | Check | Where |
|---|---|---|
| 1 | Is the status Active rather than Draft? | Product page → Status |
| 2 | Is Online Store ticked? | Product page → Publishing |
| 3 | Is there a scheduled date that has not arrived yet? | Product page → Publishing |
| 4 | Does it have the right product type and shelf tag for the collection it should be in? | Product page → Product type and Tags |
If all four are correct and the product still does not appear, allow a few minutes — collections update shortly after a change rather than instantly. If it is still missing after that, contact RevShift with the product's SKU.
Three ways, depending on why
Archive is right for a product you are finished with. It is not the only option, and it is the wrong one for a product you still intend to sell.
| Situation | Do this | Effect |
|---|---|---|
| Temporarily unavailable, still selling it | Set Status to Draft | Off the site immediately. Everything is kept and it goes straight back by setting it Active again |
| Staying in the range but should not be on the website | Untick Online Store in Publishing | Off the website, Status stays Active. Useful when a product is sold another way |
| Discontinued, not coming back | More actions → Archive product | Off the site, record and web address kept, drops out of every collection |
Archiving removes a product from every collection automatically. If a collection looks short after archiving, that is why — nothing else needs changing.